<< Part 5
Figuring Out the Correct Size for My Illustration
When I decided to self-publish my picture book, Animals In My Hair, all I did was to figure out the size of the book and then I painted the illustrations accordingly to fit that size. It was not until I met with my printers that I heard of Bleed, Trim, Gutter, and other printing terms. I had no idea that pages are printed larger than the actual size (the Trim Size) then that the edges are cut away. As a result, I spent several days using Photoshop’s Clone Stamp Tool to make all of my illustrations larger by a quarter of an inch along the edge. That quarter of an inch that is cut away is what is known as the Bleed. It is only necessary with illustrations that do not have white margins surrounding them, but go to the very edge.
I think they gave the term Bleed to that edge, because the illustration spills beyond the trim size?
The Gutter is the edge of the page on either side the seam (the very middle of the book).
I think it is called the gutter, because some of the illustration may disappear in that bend between the pages.
The gutter’s size is determined by the thickness of the book and binding. I’m not even going to go into all the different kinds of binding I discovered. If you are curious, there are plenty of articles online explaining all these details.
The last thing I’m going to mention about printing is something called Spot UV. When my printer told me that they had a special promotion and as a result they can add Spot UV to my cover, I stared at them blankly and felt very ignorant indeed. Isn’t UV Ultra Violet light? How could a book cover have Ultra Violet light?
In printing what they refer to as Spot UV is the bits of gloss they can add to the cover to give it a some shine. For Animals In My Hair, I added the Spot UV to the title and the animals at the bottom — closest to the viewer — on the front cover, the text and image on the spine, and my name and the central bolded text on the back cover. It really adds a bit of extra class to my book. I’m not fond of glossy covers, because I find the reflection irritating when I wish to look at the illustration; however, the bit of gloss that makes a title shine makes it pop from the book and makes the entire cover look three dimensional.
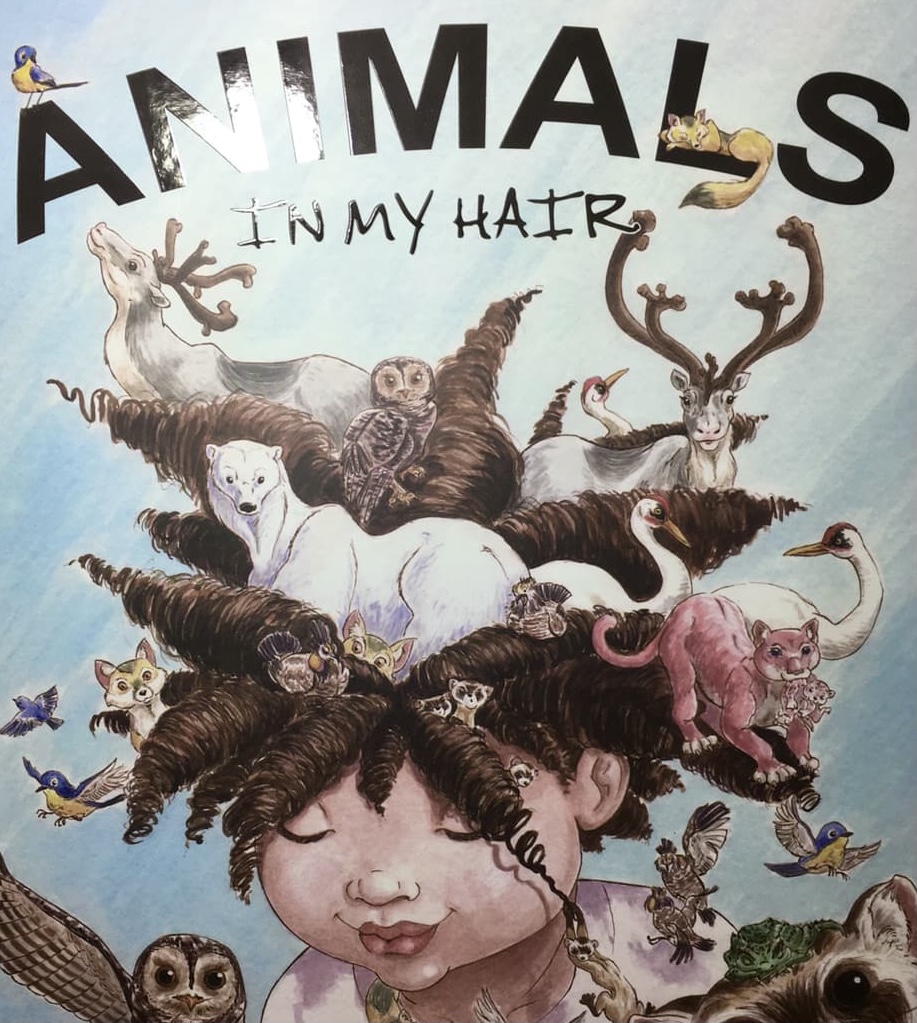
Note the reflective Sport UV in the title.
To get back to the illustration inspired by Elatsoe, the point I’m making is that you should always know your Bleed, Trim, and Gutter size before you begin illustrating. You should also know the poster size, postcard size, and other product sizes your illustration will be used for.
Therefore, when you are composing your image, you need to make sure that the image will look good for all of those different sizes.
The way I do this is by selecting the greatest ratio in the largest required size. Then I create different colour layers that fit within that size for all other ratios and sizes and set them to multiply mode. As I begin my sketches and layout, I make sure that the illustration looks good in all the different sizes.
Another important thing to note is that for an image to print well it needs to have the minimum resolution of 300ppi/dpi (pixels per inch/drops per inch — the first refers to the screen measurement the second refers to the print measurement, but for an artist they are interchangable). What does this mean?
For this illustration, the final Trim Size is to be 12″ x 16″. Therefore, when I’m in Photoshop, or in my case Procreate, and I need to create a new canvas, I will choose that size in inches and select resolution DPI to be 300.
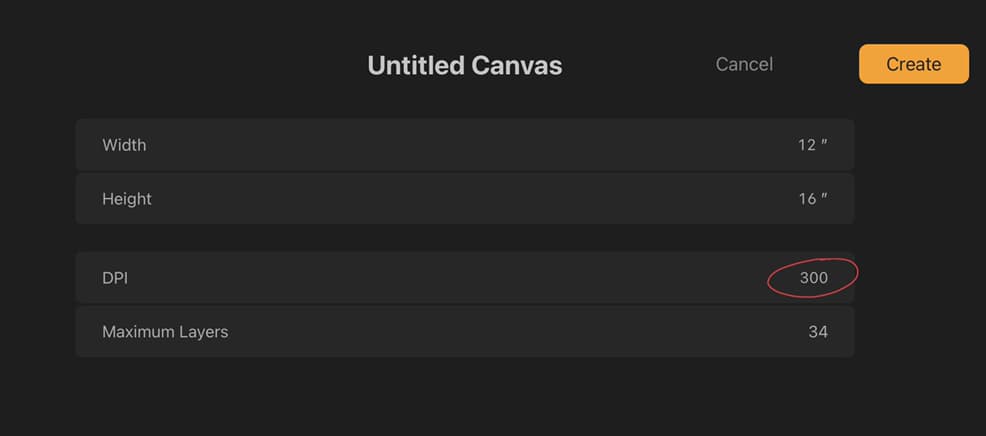
If you can only select your image size in pixel dimensions, what you need to do is to convert your dimensions from inches into pixels by multiplying each side by 300. Therefore, using the measurement above you will set you size to 3600 x 4800 pixels.
An interesting thing to note in Photoshop is that you can choose your resolution to be 72 ppi, however if your size is in pixels, it will still print at 300 ppi. Now if by accident, you set the image size in inches and you forget to change the resolution to 300 but leave it instead at 72 ppi your resolution in pixel dimensions will be 864 x 1152 and if you tried to print the image on a 12″ x 16″ paper the image would turn out pixelated. Therefore, to be safe, I recommend you always set your image size in pixel dimensions.
I also read somewhere that for Giclée art prints, the resolution needs to be 600ppi/dpi, but I have not had that verified.
Did you catch a mistake?
12″ x 16″ is the final Trim Size. Since this illustration will be bleeding to the edge, the size I should create my image in should be 12.25″ x 16.25″ or 3675px x 4875px. Don’t forget the bleed, because otherwise you too may need to spend some hours in Photoshop using the Clone Stamp Tool to add an edge to your illustration.
To be safe you should always talk to the Art Director — or if you are self-publishing to the printer — before you begin illustrating.
What if the illustration is supposed to be 24″ x 32″, double the size?
This is where it gets tricky. That dimension is too large for Procreate. I am not able to work in this size on my device.
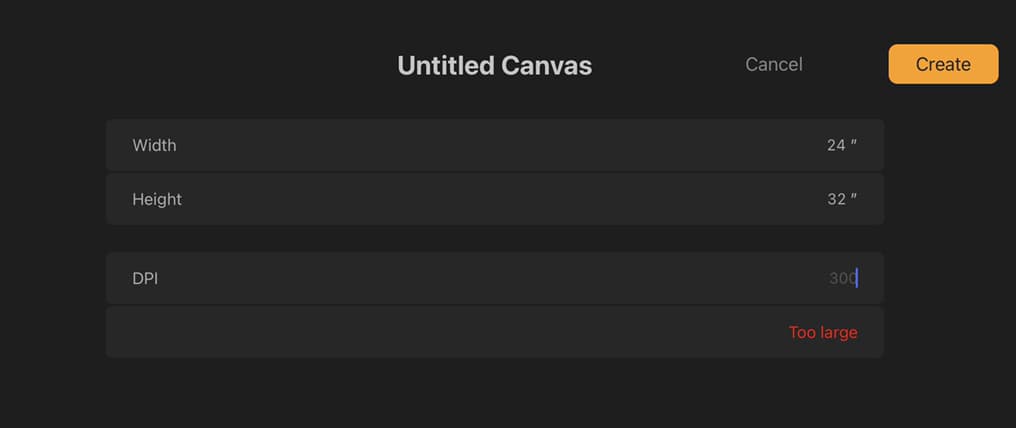
Even the slightly smaller size 18″ x 24″ only gives me 13 layers to work with. Manageable for digital painting, but not ideal.
What should I do?
Other than getting a computer or device with more power, the only thing I can do is to make the image 12″ x 16″ and scale it up. I would need to find someone (possibly the printer) with Photoshop and choose Edit > Image > Size and resize the image to 24″ x 36″, while maintaining the 300 ppi resolution. This is called Resampling. What the computer does is to create additional pixels drawing upon the existing pixels in the image, because now it needs to add extra 300 px per inch. Every time you scale the image up you will lose a bit of sharpness to that image. Doubling the size of the image may not be as noticeable and you can likely get away with it, but tripling or quadrupling the size, you will begin to notice pixelation around the edges.
It is always preferable to work in a size larger than your final illustration and scale down the image than the other way around.
Though I am pretending that the illustration I’m creating is for various printing purposes to illustrate my point, the reality is that I intend to print this illustration on Art Station, and for some reason they do not require bleed for their art prints, so the final image I’m creating is 12″ x 16″.
“Wait a minute,” you may say, “didn’t you state in the previous article that you will scale up your thumbnail to 9″ x 12″?”
Great catch. Both of these size are of the 3:4 ratio, therefore I can easily scale up from 9″ x 12″ to the 12″ x 16″ size.
“Isn’t scaling up bad?”
Yes, it is, but not when you are in your early sketching stages. This decision has to do with Procreate itself. If I work in the 9″ x 12″ size, Procreate gives me 65 Layers to work with.
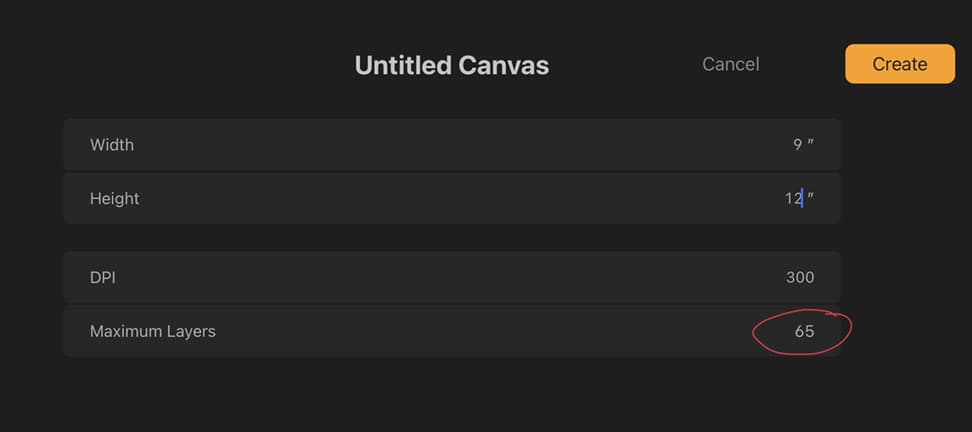
However, if I begin to work in the 12″ x 16″ size, I can only work with 34 Layers.
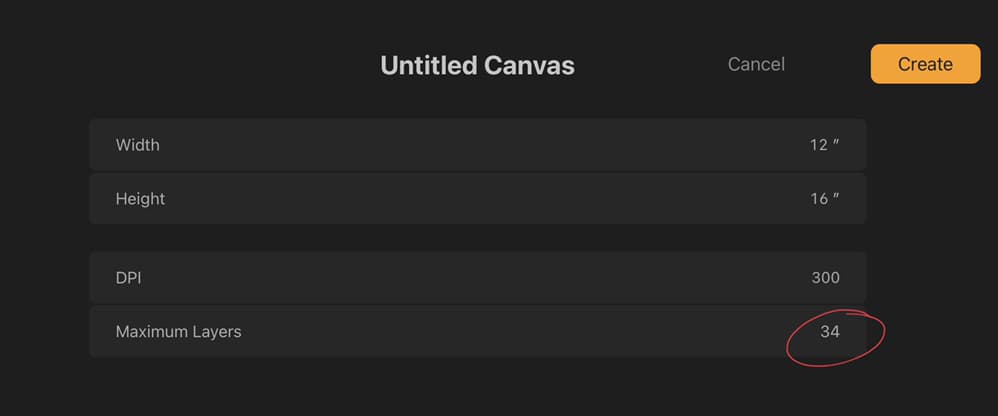
The great thing about digital illustrating is that I am able to add and remove layers while I’m figuring everything out. The more layers I have to play with, the better. 34 Layers should be more than enough; however, I know 65 layers are more than what I need. Therefore, I decided to work in the smaller size, because I will not need to scale up the image until all my sketching is out of the way and I am ready to clean up my work.
With the dimensions figured out, it is time to begin drawing.

H.O.O.Ts of Wisdom
Always know your Bleed, Trim, Gutter and final product sizes before you begin illustrating.
To be safe, always size your new canvas in pixel dimensions.
While you are figuring out your layout/sketching, create multiple layers set on Multiply Mode to accommodate every size and ratio, so you can be sure that the image will look great for every product.
Sketch in a smaller size, maintaining the final ratio, so that you can have as many layers as possible and so that your device’s CPU is not overtaxed.
